COMPANY NEWS
Clean Bench SOP: Comprehensive Operating Procedures for Startup, Disinfection, Routine Monitoring, and Filter Replacement
The clean bench is a core piece of equipment for maintaining a localized Class 100 clean environment, playing a critical role in preventing contamination during aseptic operations, sample preparation, and precision assembly. Improper operation or inadequate maintenance can easily lead to excessive particle counts and microbial contamination, resulting in product rejection and the invalidation of experimental data.
AN has compiled a comprehensive and clear Standard Operating Procedure (SOP) for clean benches—covering everything from pre-start checks, operational disinfection, and routine monitoring to filter replacement—creating a practical, documentable standard for use by equipment administrators and operators during training and daily operations.
I. Startup Operating Procedures
Inspection, pre-disinfection, and pre-operation run
1. Check
Check the power supply and power cord for integrity and ensure proper grounding; ensure the area within one meter of the workbench is free of debris and that air inlets and outlets are unobstructed.
Check the equipment status label to confirm it is in good, usable condition; inspect the work surface and interior chamber to ensure they are free of waste liquid, residue, and foreign objects.
Verify that the front window opens and closes properly and the sealing gasket is intact; ensure there are no fault alarms on the differential pressure gauge or control panel.
⚠️If the equipment is to remain idle for an extended period (shutdown exceeding 7 days), the chamber must first be cleaned and a preliminary integrity check performed.
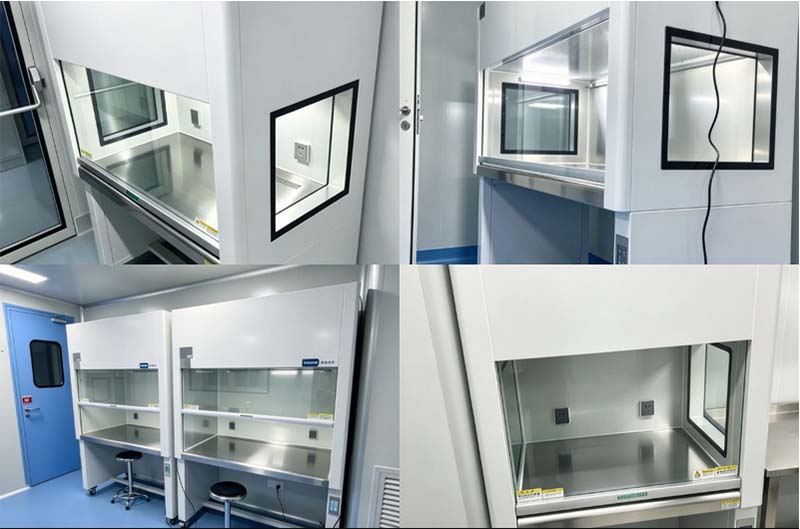
2. Pre-disinfection and pre-operation
Close the front window, ensure personnel have left the operating area, and turn on the UV germicidal lamp to irradiate the interior of the chamber for 30 minutes for surface disinfection.
⚠️ Personnel are strictly prohibited from remaining in the area while the UV lamp is on to prevent UV burns to the skin and eyes; if an ozone-generating UV lamp is used, ensure thorough ventilation after irradiation.
Upon completion of UV sterilization, turn off the UV lamp and activate the fan; allow it to run continuously for 20–30 minutes to self-clean the chamber and stabilize the laminar airflow.
Switch on the lighting. Using a lint-free cloth dampened with 75% ethanol, wipe the work surface, interior walls, diffuser screen, and glass viewing window in a single direction—moving from the inside out—and allow them to air dry.
Once the airflow has stabilized, adjust the front viewing window to the specified operating height. Operations may only commence after donning cleanroom attire, a face mask, and sterile gloves.
⚠️ Operational Guidelines: Move gently to avoid large arm movements that could disrupt the laminar airflow; arrange items in designated zones (clean zone, work zone, and waste zone) without blocking the intake grilles; open flames are strictly prohibited inside the unit.
II. Disinfection Procedures
Pre-use, post-use, and periodic deep disinfection
✅ Pre-use disinfection
Irradiate with UV light for 30 minutes and wipe all internal contact surfaces with 75% ethanol; disinfect the exterior surfaces of consumables before transferring them into the workstation.
✅ Post-use disinfection
Remove all samples, consumables, and waste from the workstation; promptly clear away any liquid waste or residue.
Wipe the work surface, interior walls, liquid collection tray, and glass viewing window in a single direction using a lint-free cloth dampened with 75% ethanol to remove organic residues.
Keep the fan running for 10–15 minutes to clear suspended particles from the chamber.
Turn off the fan and lighting; close the front window; activate the UV light for 30 minutes if disinfection is required; upon completion, turn off the UV light and disconnect the power supply.
✅ Regular deep cleaning and disinfection (performed weekly)
Remove the detachable front grille and liquid collection tray; clean them using a neutral detergent, rinse with purified water, air-dry, and reinstall. Thoroughly wipe down the interior chamber, ensuring dust is removed from all hard-to-reach corners.
❗ Do not allow highly corrosive chlorine-based disinfectants to come into direct, prolonged contact with stainless steel surfaces or filters, as this can corrode and damage the filter media and sheet metal components.
III. Routine Monitoring and Recording
Key GMP Inspection Items
Q: Daily Monitoring
A: Visual inspection: Check for abnormal noise or odors; observe fan operating status; inspect the work surface for damage or leaks; check for sudden changes in differential pressure gauge readings. Record-keeping: Maintain an equipment operation log, recording startup time, disinfection time, and equipment status.
Q: Monthly Monitoring
A: Airflow velocity monitoring: Measure the average airflow velocity in the work area using an anemometer (standard range: 0.3–0.5 m/s); if the velocity falls outside this range, investigate potential filter clogging or fan failure.
Differential pressure monitoring: Record the filter differential pressure and compare it with the initial value; if the pressure rises by more than 50% above the initial value, evaluate the need for filter replacement. Particle and settling bacteria monitoring: Use a particle counter to measure 0.5 μm particles as required; conduct settling bacteria tests to verify compliance for Class 100 clean zones. UV lamp monitoring: Wipe dust from the lamp surface and check the cumulative usage time; replacement is recommended after 2,000 hours of cumulative use.
Q: Quarterly / Annual Validation
A: Annual comprehensive performance validation: airflow patterns, particle concentration, settling bacteria, and filter integrity testing (PAO leak test); a validation report is issued and filed.
IV. Filter Replacement Operating Procedures
Pre-filter + High-Efficiency HEPA Filter
Q: Replacement criteria
A: Pre-filters: Typically 1–3 months, or when there is visible dust accumulation or an increase in pressure differential; washable, but replace immediately if damaged. High-efficiency HEPA filters: Must be replaced after shutting down the unit if the pressure differential reaches 50% of the initial value, a leak is detected via PAO testing, or particle counts in the work area consistently exceed limits; typical service life is approximately 3–5 years, depending on environmental dust levels.
Q: Preparation before replacement
A: Shut down the machine, disconnect the main power supply, and attach a "Under Maintenance – Do Not Operate" tag to the equipment.
Operators must wear dust masks and disposable gloves; take protective measures to prevent dust from the old filter media from contaminating the environment.
Prepare the new filter, sealant, lint-free cloth, leak detection equipment, and trash bags.
Q: Replacement Procedure
A: Remove the equipment panel, take out the old filter, seal and package it, and dispose of it in accordance with hazardous waste regulations; do not beat or shake the old filter media to prevent dust dispersion.
Clean accumulated dust from the filter frame and sealing groove, and inspect the frame for deformation. Install the new filter, paying attention to the airflow direction indicator; ensure the gasket lies flat without gaps and is tightened evenly to avoid air leakage caused by uneven pressure.
After installation, replace the panel, power on the unit, and run the fan continuously for 30 minutes. Perform a PAO integrity leak test to confirm there are no leaks; re-measure the airflow velocity and particle concentration in the work area, and put the unit into service only after it meets Class 100 standards.
Record the filter model, replacement date, initial pressure differential, and leak test results, and update the equipment log.
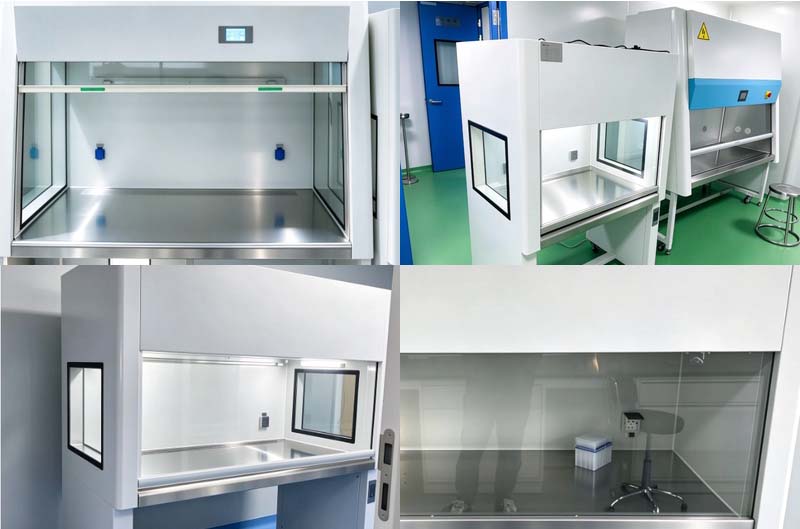
General Precautions:
Do not allow strong acids, strong alkalis, or highly corrosive liquids to spill onto the work surface for extended periods; clean up and disinfect any spills immediately.
Do not stack large quantities of items in the work area, as this may disrupt the unidirectional laminar airflow.
In the event of abnormalities such as unusual noises, alarms, or air leaks, shut down the equipment immediately and contact Zhongke Shengjie technical personnel for repair; unauthorized disassembly is prohibited.
Records regarding operation, disinfection, monitoring, and maintenance must be centrally filed and managed.
The proper implementation of Standard Operating Procedures (SOPs) is essential for ensuring that clean benches consistently maintain a Class 100 clean environment. Zhongke Shengjie clean benches feature high-efficiency filters, 304 stainless steel work surfaces, and a stable laminar airflow design. They are engineered to meet the stringent cleanliness requirements of sectors such as pharmaceutical sterile processing, biological laboratories, and precision semiconductor manufacturing. We also offer comprehensive technical services, including equipment validation, maintenance, and filter replacement.
Please contact AN Company for assistance with model selection, on-site validation, or technical support for maintenance and servicing.
